SMART Board + iPad Lesson Ideas #edchat #ncedchat #smarttech #edtech #ncedtech

This article originally appeared on the EDCompass Blog.  Click here for the original URL. Shared with permission.

Jeff is the Campus Instructional Technology Specialist at Lamar Consolidated ISD in Texas. We asked him how educators are using iPads and SMART Board interactive whiteboards in his district and here’s what he had to say about SMART Notebook app for iPad.

By Jeff Peterson

Here’s one way I have encouraged teachers to use the SMART Notebook app for iPad in their classrooms.  While not happening in every class, the number of iPads on campus continues to grow and more teachers are taking interest in this type of learning activity.

Problem: teachers are reluctant to hand over tech

At the high school level, it can be difficult to get teachers to volunteer to give up control of the SMART Board for student interaction.  While teachers will from time-to-time allow students to interact on a limited basis to work out a problem on the board,they do not allow the students the opportunity to drive the lesson through interaction as much as they should.  This can happen for several reasons:  large class size, room design, discipline concerns, limited time, etc.

New idea: ease teachers into student-centered mindset with app

This is where the SMART Notebook app for the iPad can come into play and start to change things up.  The app provides an opportunity for the students to actively engage in the same lesson being demonstrated at the SMART Board.  The idea is simple:  give the students the same lesson file that the teacher is using for the demonstration on their iPad.  Then as the teacher goes through the learning activity, the students follow along and perform the same steps.  This gives the students the ability to learn through auditory, visual, and kinesthetic learning styles throughout the lesson.  Students learn best when actively engaged in the lesson.  If there are enough iPads, students have the opportunity to be part of the lesson.

Throughout the lesson, the teacher can place practice problems on separate pages so that after demonstration problems, the students can immediately practice what was just taught.  Questions can be addressed immediately and the teacher can be confident that the students understand the material before moving on in the lesson.  At the conclusion of the lesson, the students can submit their work back to the teacher, so the teacher can verify the students were on task and understanding of what was taught.

File management tips

Sharing the lesson file can be very simple through cloud storage like Dropbox, SkyDrive or another cloud storage service.  Having the iPads linked to this storage service makes uploading and downloading of lessons simple.  One word of caution for doing this: depending on your network’s bandwidth and internet connection speed, you may want to monitor the size of the SMART Notebook file that you are sharing with the students.  Large files may have problems downloading or uploading efficiently if network resources are limited.  A small, simple lesson is recommended to start.

About Jeff Peterson

Jeff Peterson is a SMART Exemplary Educator and Campus Technology Specialist in Lamar CISD, located in Rosenberg, Texas. In addition to in-person support, he posts resources to his district’s Interact Cafe for teachers in the district. INTERACT is an acronym for Integrating Technology Realistically Among Classroom Teachers. Prior to that, Jeff taught high school computer applications courses in the district. You can find him on Twitter at @jefflcisd.


SMART Calendar Organizer #edchat #ncedchat #smarttech #edtech #ncedtech

This article originally appeared on the EDCompass Blog.  Click here for the original URL. Shared with permission.

If you’ve read any of SMART Exemplary Educator John Mein’s previous blog posts, you know he often employs student-centered games with SMART products to engage his middle school learners. Now he applies that same spirit of interactivity to lesson planning — check it out. This post originally appeared on John’s blog. Used with permission.

By John Mein

I hope everyone has had a wonderful summer vacation thus far.  We’ve been very busy this summer, between summer camps, family reunion road trips, and hanging out with my family and friends, it’s crazy to me that July has come to an end.  We all know, with the end of July comes the beginning of August and Back to School Bonanza starts gracing the aisles of Walmart again. Ugh, lesson plans… is there anything more mundane?

The only thing worse than having to write lesson plans is having to reteach after students have been sick, on vacation, or are in an alternative education placement. You have to come up with new examples that break the flow of the current lesson you’re trying to cover.  If only there was a way to effectively keep track of every day of the school year.  You could reteach using the same examples in the same way that everyone else was taught.  You could even post those lessons online to be viewed, or reviewed, by your students that need at-home remediation. They could download the lessons posted to a class website or blog, and they could open them using www.smartnotebook.com.

With this in mind, I created a Flash-based calendar that should solve just this problem! This is based on a model that I have used in my district for the last three years, and I have found it to be highly effective. The only reason I haven’t shared it worldwide up to this point is that it was through SMART Notebook software, and it wasn’t logistically possible for me to set the links in a manageable way.

The general idea is that it works very much like a daily organizer.  You select the month and then the date, and a NB file for that date will be automatically downloaded to your computer.  Everything you do on that day will be saved locally on your hard drive so you may refer back to it when needed.  When you have a student come in that has been absent, you can print out the presentation, you can save the file to Dropbox and post a link on your class website, or you can email it to the student/parent that has requested it. Each day is formatted in four areas: warm-up, guided practice, independent practice, and interactivity.  This provides for the needs of all grade levels.  The beauty of the calendar, itself, is that I don’t have to create a new one every year because it is formatted by date- not by day.  It is live now, and it’s ready to be utilized.

This was my first Flash venture, so more than likely there will be some hiccups.  If you manage to run into one, please send me an email or make a comment in the thread.

Run Smart Calendar HERE. Enjoy!

Thanks for stopping by,

About John Mein

John Mein is a seventh grade Language Arts teacher in Kerrville, Texas. He’s a SMART Certified Trainer as well as a SMART Exemplary Educator. To explore more tips, tricks and resources to help you use SMART products in your classroom, visit John’s blog at mrsmarttrainer.blogspot.com and follow him on Twitter at @johnmein.


SMART Board + iPad Workflow #edchat #ncedchat #smarttech #edtech #ncedtech

This article originally appeared on the EDCompass Blog.  Click here for the original URL. Shared with permission.

Cherie Herring is a SMART Exemplary Educator who teaches at Hammond School in Columbia, South Carolina. Cherie writes and manages a really exceptional blog called Just a Little More, where she shares her ideas and resources — connecting with other educators about her experiences in an elementary music classroom. She kindly agreed to share her post about the workflow she created for using iPads and her SMART Board interactive whiteboard. We know this is a popular question, so here is how Cherie currently does it. Used with permission.

By Cherie Herring

In preparation for year two with 1:1 iPads and a SMART Board, improving the workflow is uppermost in my mind. Integrating technology seamlessly is my goal.

Today, I had an ah-ha moment and discovered a way to save about 7-8 minutes delivering content to my students for this listening activity using SMART Boards + iPads. It makes perfect sense. I should have known it already. But when the light bulb comes on in my little, lonely island office, it’s worth celebrating. See what you think about this workflow.

Improving the high/low workflow

I created a very simple high/ low interactive activity for the SMART Board. I wanted students to touch a button, listen to the sounds, and notate the correct pattern on the SMART Board. I also wanted students in my 1:1 iPad class to have the same image on their iPads so they could individually respond during this activity. The only way I knew to do that last year was to create a QR code linked to the image. Plus, I  wanted the students to have multiple pages of the image for the activity and extension assignment. AND, I wanted this experience to be the supporting activity, taking only half of the lesson time. Sounds simple, but delivering the content ended up taking way too long…. turning the 15 minute assessment into a 30 minute mess adventure. I mean, it was okay for the first year, but there had to be a better way! Since we don’t yet have the SMART Notebook app for iPad*, I needed another SMART Board + iPad workflow solution.

Here is what the first year 1:1 iPad workflow looked like for this activity:

Here is my new and improved workflow plan for year 2:

“Explain Everything” is such an incredible app for my students to use to demonstrate understanding. If, in my 30 minute class time, I can pull off seamlessly integrating technology into this activity, it’s definitely a win-win for all.

Workflow steps

First, I created the image in SMART Notebook and exported the images [File>Export>image files]. There are many ways to create cool images in Notebook… but that’s another post! In “Explain Everything,” I imported the image, made it the background for the page, and duplicated the pages. Once I finished creating all the pages, I saved and exported the project, saving it as .xpl.  – an “Explain Everything” file. Here is what the exporting screen looks like in” Explain Everything.”

Slingshot Listening Activity: SMART Board + iPad

If you’ve been so kind to read through the above explanation, and you would like to use this high/low listening activity, you may download it here. The QR code with the link to the “Explain Everything” file for the children is included as one of the pages.

Do you want to see it in the classroom?

I think this solution will allow my classes to experience the best of both the SMART Board and the iPads. I LOVE being able to use both seamlessly!

What new workflow ideas have you discovered recently?

As James Hollis says, “Sharing is caring!!”

* Editor’s note: Cherie, let’s talk soon about SMART Notebook app for iPad. :)

About Cherie Herring

Hi there! I share creative ideas for teaching music with technology. I am a SMART Exemplary Educator teaching with 1:1 iPads and a SMART Board, I create interactive SMART Notebook lessons and blog about technology integration in the music classroom.

SeedPD Blog Feature: SMART Exchange File of the Week! #edchat #ncedchat #smarttech #edtech #ncedtech

To add more teacher content to our site, the SeedPD Blog is sharing one teacher-created SMART Exchange file every Friday. All files shared will be Common Core relevant, and we’ll be sure to share with you the standard(s) being addressed.

This entry is a file entitled “The Star Spangled Banner”. In this file, students will experience the Star Spangled Banner and use the lyrics to learn more difficult words. Students start out by listening to the song, then fill in missing words in the lyrics on subsequent Notebook pages. Later, students learn the definitions of those  words and complete a review activity to cement the  words into their vocabulary! This is definitely a “teaching across the curriculum” lesson, in that it seamlessly integrates with American revolution concepts and themes. Enjoy!

9-6-13 File of the Week Screenshot 1 9-6-13 File of the Week Screenshot 2 9-6-13 File of the Week Screenshot 3 9-6-13 File of the Week Screenshot 4 9-6-13 File of the Week Screenshot 5

Common Core Standards Addressed:  LA.5.L.CCR.6, LA.5.L.5.6, LA.5.L.CCR.4, LA.5.L.5.4, LA.5.L.5.4.c
Direct Link to Presentation Filehttp://exchange.smarttech.com/details.html?id=2eb12c7d-c924-4f58-bea2-972672c5d0a1
Number of Downloads: 3,696
Created by: S. Gregory (Stillwater Public Schools)

Check back in with us next Friday to learn about another great Common Core file!

Flipping Classrooms the SMART Way #edchat #ncedchat #smarttech #edtech #ncedtech

This article originally appeared on the EDCompass Blog.  Click here for the original URL. Shared with permission.

Michelle Phillips is a science teacher and flipped classroom enthusiast based in McKinney, Texas. She’s also a  SMART Exemplary Educator and frequent participant in Tuesday night #SMARTee chats on Twitter. Michelle recently presented at Allen ISD’s Annual Flipped Classroom Conference and here’s what she had to say. This post was originally published on Michelle’s blog techwithmichelle.wordpress.com. Used with permission.

By Michelle Phillips

Last week I attended Allen ISD’s 2nd Annual Flipped Classroom Conference cohosted by Flipped Learning.  Jonathan Bergmann and Aaron Sams started out the day discussing the best practices in the Flipped Classroom and sharing their journey during the last six years.  You can check out their websites as well as some of the videos they shared by going to the  Google Docs page.  Bergmann and Sams suggested starting with a flipped lesson or recording your lessons and slowly working up to flipping your class.

Flipping the SMART Way

I presented a breakout session during the day about flipping the classroom with SMART products.   I started flipping lessons in my 6th grade science classroom last year.  As a SMART Exemplary Educator and SMART Certified Trainer,  I love using my SMART Board and SMART Response in my classroom and found engaging ways to incorporate them into the flipped model of learning.

The way I started becoming more familiar and comfortable with the flipped model is very similar to how Bergmann and Sams started out.  I would create interactive SMART Board lessons to use in my class, record them and post to my website.  This gave students that were absent a great way to get the missed concepts and for students that were in class a way to review.  My very first flipped lesson was on the concept of force and motion.  I usedSMART Notebook software to create a lesson and then used SMART Recorder to video it and then posted it on my website.   I used a learning contract to guide student activities that pertained to the concepts from the video.  Students could work at their own pace and I was available to support them as they learned through inquiry.   I slowly incorporated more flipped lessons throughout the year and also included aspects of project-based learning.  My students started using SMART Notebook to create lessons and their own videos.  Students also enjoyed the immediate feedback they received from using SMART Response.

Student reaction to flipping

Using the flipped model in my classroom last year was a huge success. The students loved the differentiation and personal attention I was able to provide and parents enjoyed knowing what their students were learning.  The most important thing I learned last year was that there is no right way to use the flipped model.  It can look different from one classroom to the next.  You have to decide what is the best use of your face-to-face class time (Bergmann and Sams).  For me, sometimes this means direct instruction and other times it was class discussion or lab activities.

My students were thrilled to share how they used SMART products during a SMART Texas Virtual User Group Webinar.  The link to this recording and other resources from my classroom can be found on my blog.

About Michelle Phillips

Michelle Phillips is a science teacher and flipped classroom enthusiast based in McKinney, Texas. She’s also a  SMART Exemplary Educator and frequent participant in Tuesday night #SMARTee chats on Twitter. You can follow Michelle on Twitter using the handle @gobluefamily and visit  her blog http://www.techwithmichelle.com.


Back to School – Must-Have Downloads from SMART Exchange (Part Two) #edchat #ncedchat #smarttech #edtech #ncedtech

This article originally appeared on the EDCompass Blog.  Click here for the original URL. Shared with permission.

The new school year approaches for many educators in North America and Europe. For some it has already begun – how are those first days going?

I want to help ease you back into the school mindset by making it a little easier to find the best new collaborative applications, widgets and add-ons available for download from the SMART Exchange website.

If you haven’t read the first post in this series, check out Back to School – Part One here.

Today, let’s talk about applications for the SMART Table 442i collaborative learning center because many schools received theirs over the summer.

Do you feel like staff eyes are on you and curious about what you will do with this new hardware in your early education, inclusion or special needs environment? If so, don’t worry – just check SMART Exchange regularly for new content and applications to inspire your creativity in the classroom. I’ve also collected a few additional tips below.

New SMART Table applications

Did you know there are over 1,000 SMART Table activities available for download from SMART Exchange? The two latest additions are free applications – Scrapbook and Symphony.

Scrapbook enables digital scrapbook creation by writing, drawing and inserting images. Yes – collaborative content creation is now possible directly on SMART Table with this new application! A great new application for any project-based exploration.

Symphony enables up to four students to play instruments on the table and record a musical composition collaboratively. Up to eight students are ready to learn while creating music.

Search for Scrapbook or Symphony directly from the SMART Exchange interface on SMART Table. You can download the application directly over school Wi-Fi – no USB key necessary.

More tips

  1. In addition to Scrapbook and Symphony, remember you can download the SMART Table Toolkit forWindows and Mac to easily create your own personalized SMART Table activities.
  2. Also be sure to check out the free training resources, join the training community on SMART Exchange and Heather’s Digital Dashboard to learn new tips and grow your PLN.

Back to School – Must-Have Downloads from SMART Exchange (Part One) #edchat #ncedchat #smarttech #edtech #ncedtech

This article originally appeared on the EDCompass Blog.  Click here for the original URL. Shared with permission.

When I mention the SMART Exchange website to educators, they often remark, “Yes – the place to download Notebook files. Say no more.”

But there is more.

While it’s true that SMART Exchange is a repository of teacher-submitted lesson activities, you’re missing out if you just go there to download supplemental resources. The website also hosts applications, add-ons and widgets that will enhance collaboration and connect different technologies in the classroom.

I’m excited to draw your attention to some recently-added widgets posted to the website.

SMART Response Widgets

Widgets add additional features and functions to the SMART Response interactive response software you know and use already. Download them before school starts see how you can make student participation more visually engaging and compelling.

  • SMART Response Widget – Concept-mapping enables both student feedback with SMART Response and inked items on a SMART Board interactive whiteboard to instantly come together as a concept map on the SMART Notebook page

SMART Response Widgets in practice

Concept-mapping and word cloud activities are easily incorporated into any moment when formative feedback would be helpful to showcase the learner’s understanding of concept, explore relationships between ideas, ignite a debate or dig deeper into sub-categories. And because these widgets are easily added into your SMART Notebook file, you can do so very spontaneously.

How to get started

  1. Update to the latest Windows or Mac version of SMART Notebook software. Make sure you have version 11.2 installed prior to downloading these two widgets.
  2. Watch our YouTube videos to see the SMART Response Widgets in action.

Concept-mapping tutorial

Word cloud tutorial

  1. Install each widget by dragging it onto an open Notebook page or saving in the My Content gallery folder to make it more accessible when you pull up your existing SMART Notebook lessons.
  2. Discuss the widgets with the training community on SMART Exchange (click on the training tab, registration is required).


Getting started with SMART using SMARTBoardGoodies.com #edchat #ncedchat #smarttech #edtech #ncedtech

This article originally appeared on the EDCompass Blog.  Click here for the original URL. Shared with permission.

If you’ve ever checked out SMARTBoardGoodies.com, you know the work of Amber Coggin – an elementary technology teacher and SMART Board Certified Trainer from Mobile, Alabama. Find out how Amber got started and hear her resource recommendations!

By Amber Coggin

SMARTBoardGoodies.com got its start in 2009 when I began scouring the Internet looking for games and other resources that work well on the SMART Board. I acquired so many wonderful resources that I decided to create a blog in order to share them with not only the educators in my school and district, but educators around the world! I began sharing all of my blog posts on Twitter, and from there, other educators starting sharing with their network of teachers. On my site, you will not only find web-based games and activities, but also SMART Notebook files that I have created. You will also find various links to different websites categorized by subject, links to other educational technology projects I’ve been involved in and more. I’ve highlighted a few of my most downloaded resources here.

SMART Notebook Facebook Template

I was inspired to create a Facebook page template for SMART Notebook after seeing various other templates in other popular file formats. This template can be used to create a “fake” Facebook page for any famous person your students may be studying. Students will enjoy creating a page for an artist, an inventor, a sports figure (see my Hank Aaron example), or a character from a book or movie. This activity can also be used for teaching students about social media and Internet safety. Many school districts block access to social media sites such as Facebook and Twitter, but this template will make the students feel as though they are using the real thing! You’ll notice there are several versions of the template within the Notebook file. On one page, all the objects are locked, which means they can still be unlocked and be moved by students. Since I teach elementary students, I prefer not to give them access to unlock and delete/move objects; therefore, I used the “Format- Themes- Create Theme from Page” feature in order to convert the page into a theme that can’t be edited by the students. Using the theme template, students are then just expected to use the text tool and insert images. If you click on the Attachments Tab, you will find a worksheet that can be used in conjunction with this activity. I always have my students complete the worksheet first before I allow them to begin working in SMART Notebook software. You can download this file from mySMART Exchange page. You may also want to check out my SMART Notebook Template for Twitter.

Reading and Language Intervention SMART Notebook Files

Another popular resource that I’ve shared are my K-2 and 3-5 Reading and Language Intervention files. These files include web resource links for language and reading skills such as short vowels, CVC, blending, main idea, author’s purpose, and more. Linking is used a lot in this file. This allows younger to students to navigate through the pages without much assistance from the teacher, making it a perfect center activity. You can download both files from my  SMART Exchange page.

About Amber Coggin Amber Coggin is an elementary technology teacher and Certified SMART Board Trainer from Mobile, Alabama. She is also the author ofsmartboardgoodies.com, a blog in which she shares Notebook files and other resources that work well on the SMART Board. You can follow her on Twitter at @ambercoggin or on Facebook.

SeedPD Blog Feature: SMART Exchange File of the Week! #edchat #ncedchat #smarttech #edtech #ncedtech

To add more teacher content to our site, the SeedPD Blog is sharing one teacher-created SMART Exchange file every Friday. All files shared will be Common Core relevant, and we’ll be sure to share with you the standard(s) being addressed.

This entry is a file entitled “Angles”. In this file, students will be introduced and learn how to identify and estimate the size of angles. They also learn how to measure angles using a protractor! In addition to using interactive activities to introduce and practice concepts, students are able to use the protractor tool in SMART Notebook to measure angles. There is also a practice page at the end of the file where students can create, identify, and measure their own angles, in addition to a vocabulary game!

8-23-13 Exchange File of the Week Screenshot 1 8-23-13 Exchange File of the Week Screenshot 2 8-23-13 Exchange File of the Week Screenshot 3 8-23-13 Exchange File of the Week Screenshot 4 8-23-13 Exchange File of the Week Screenshot 5 8-23-13 Exchange File of the Week Screenshot 6

Common Core Standards Addressed:  MA.4.4.G, MA.4., MA.4.4.G.1
Direct Link to Presentation Filehttp://exchange.smarttech.com/details.html?id=7c84787c-1b96-4371-956b-ba720769a332
Number of Downloads: 12,715
Created by: Sally Andreola

Check back in with us next Friday to learn about another great Common Core file!

SeedPD Blog Feature: SMART Exchange File of the Week! #edchat #ncedchat #smarttech #edtech #ncedtech

To add more teacher content to our site, the SeedPD Blog is sharing one teacher-created SMART Exchange file every Friday. All files shared will be Common Core relevant, and we’ll be sure to share with you the standard(s) being addressed.

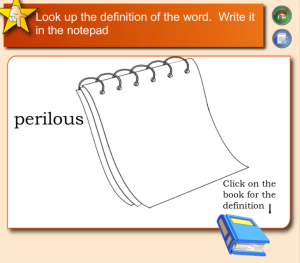
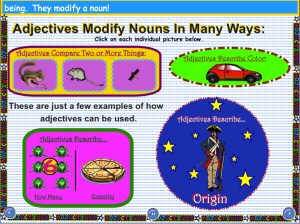
This entry is a file entitled “Adjectives”. In this file, students will be introduced to adjectives and learn how to identify them whether they are written or spoken. This file is short, but is long on engagement, examples, and interactivity. Enjoy!

8-9-13 File of the Week Screenshot 1 8-9-13 File of the Week Screenshot 2 8-9-13 File of the Week Screenshot 3 8-9-13 File of the Week Screenshot 4 8-9-13 File of the Week Screenshot 5 8-9-13 File of the Week Screenshot 6 8-9-13 File of the Week Screenshot 7 8-9-13 File of the Week Screenshot 8

Common Core Standards Addressed: LA.3.L, LA.3., LA.3.L.CCR.1, LA.3.L.3.1, LA.3.L.3.1.a,
Direct Link to Presentation Filehttp://exchange.smarttech.com/details.html?id=41b89f26-893e-4636-9fd2-8ab6fa6a99c3
Number of Downloads: 54,033
Created by: K. Rodemoyer

Check back in with us next Friday to learn about another great Common Core file!